This document shows how to use the tool “Purchase Receipts”. Its function is to provide information of the entries to my warehouses.
View of the main page:
Information appears distributed in columns arranged horizontally. However, the program allows us to make a distribution through the following options:
-
Columns: in the box that introduces each column there is a small tab on the right. Here appears the option “Column”, which allows us to select or disable the fields that are displayed on the main screen.
-
Sort: option of sorting the information in the column in an ascending or descending way.
-
Filters: (see Filters).
On the other hand, the size of the columns can be changed using the cursor that appears between them.

Toolbar, option “New”:
-
New:
-
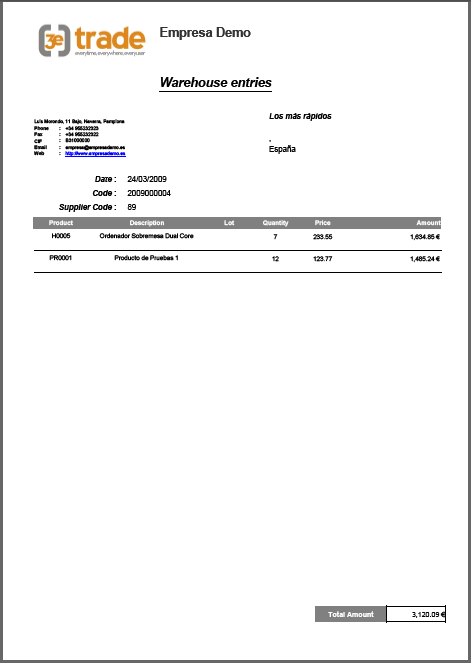
Print Entry: option to print the warehouse entry in a PDF document.
-
Purchase Order: option to add a purchase order to the warehouse entry.
-
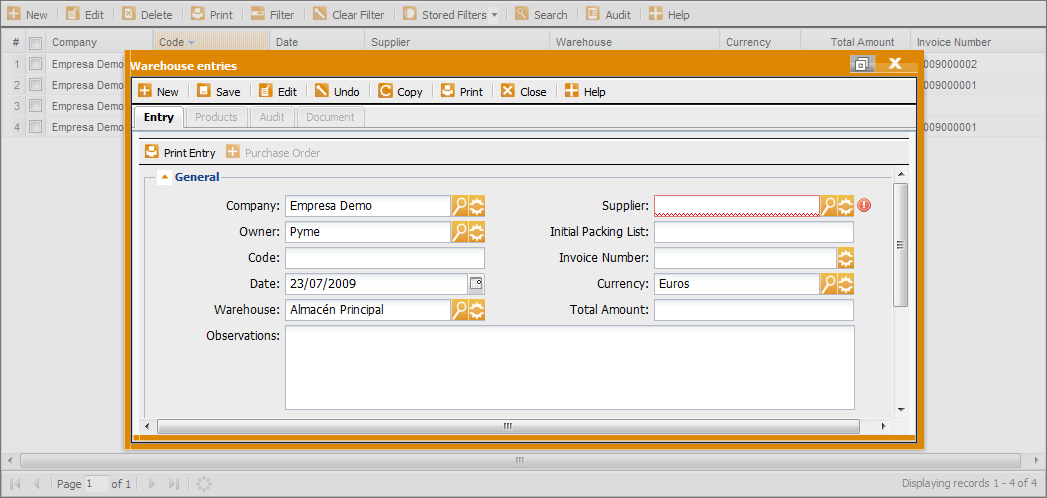
General:
-
Company: company the user works in.
-
Supplier: supplier who provided the purchase.
-
Owner: option to add an owner. By default here appears the user who created the entry.
-
Initial Packing List: code used by the supplier.
-
Code: identification given automatically to the entry. It has ten numbers: first four refer to the year of creation and the last six refer to the number assigned to the record.
-
Invoice Number.
-
Date: date of the entry. This date is also registered in the control of stock system.
-
Currency: currency used for the amount of the purchase. Usually, the one used by the supplier.
-
Warehouse: place where the product is housed.
-
Total amount: total amount of the entry. This field is completed automatically by the system when the user adds purchase orders / products to the warehouse entry.
-
Observations.
-
Change:
-
Currency Exchange: currency to which the amount of the warehouse entry is converted.
-
Quantity Exchange: unit to make the conversion between the two currencies.
Below this toolbar there are two buttons which allow action on the records:
Toolbar “New”, besides “Warehouse Entry” provides the following options, which will be opened automatically as the user saves the changes:
-
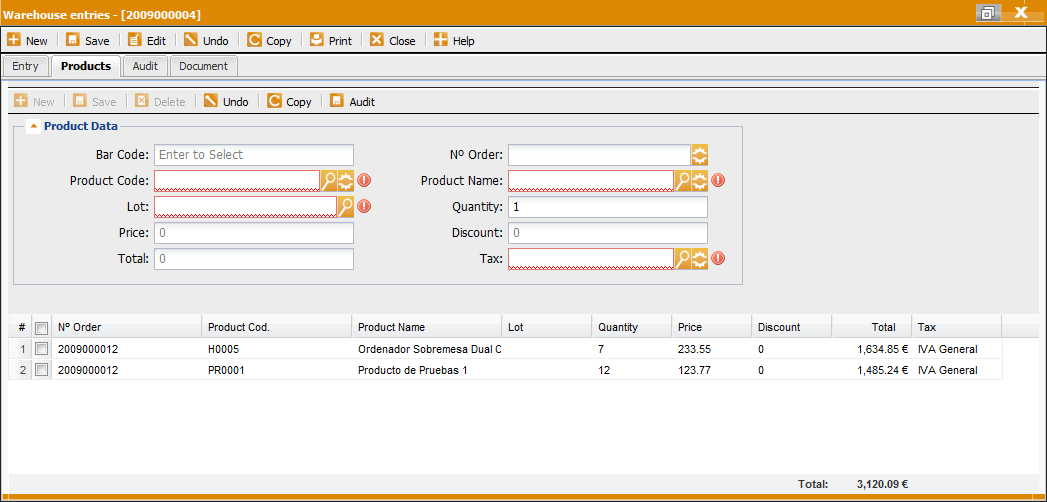
Product Data this tab allows to add products to the warehouse entry. The tab has the following fields:
-
Option “New” to add a product:
-
Bar Code: field to read the bar code of the product or the field EAN.
-
Number Order: order the purchase was imported from.
-
Product Code: identification of the product.
-
Product Name: identification of the product. It appears by default when the user selects a code, but it can be modified manually.
-
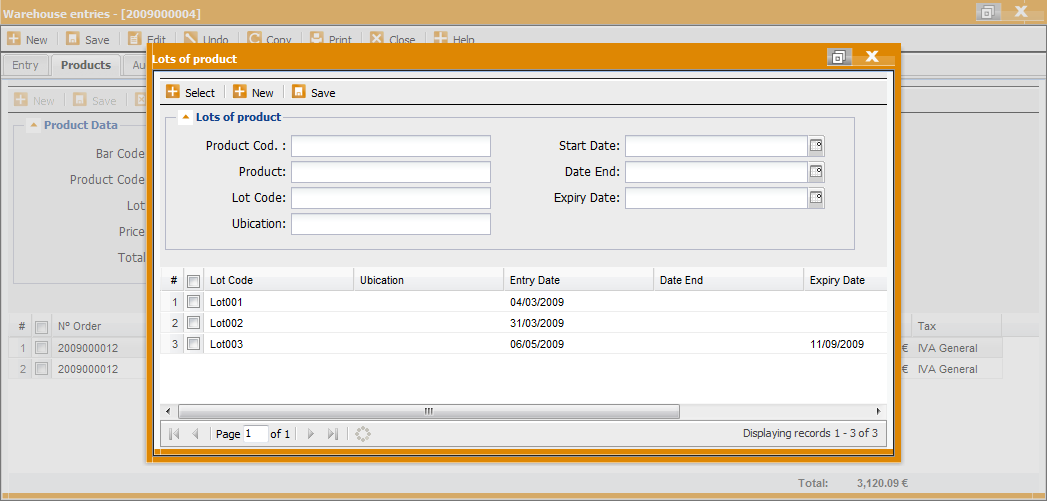
Lot: identifies the lot the product belongs to if the product has “Stock control by lot”. This field is mandatory for the products with control of stock by lot. The application allows to select or create a lot by clicking on the button (*).
-
Quantity: option to introduce the quantity of the product that is going to be added to the warehouse entry.
-
Price: amount of the product unit. If the product has a tariff assigned, this field will be completed automatically. However, the price can be added manually
-
Discount: if the product has a discount assigned, this field will be completed automatically. However, the discount can be modified manually.
-
Total: field completed automatically taking into account the data entered in Quantity, Price and Discount.
-
Tax: indicates the tax applied according to the supplier and the product.
-
Option “Save” to register the product. The products added will be stored in the list that appears in the down side of the tab. At the end of this list the system will indicate the total amount obtained as a result of the sum of all the records.
-
Option “Delete”: to erase a product it has to be selected on the list and press “Delete”.
(*)Pop up window to select or add a lot:
-
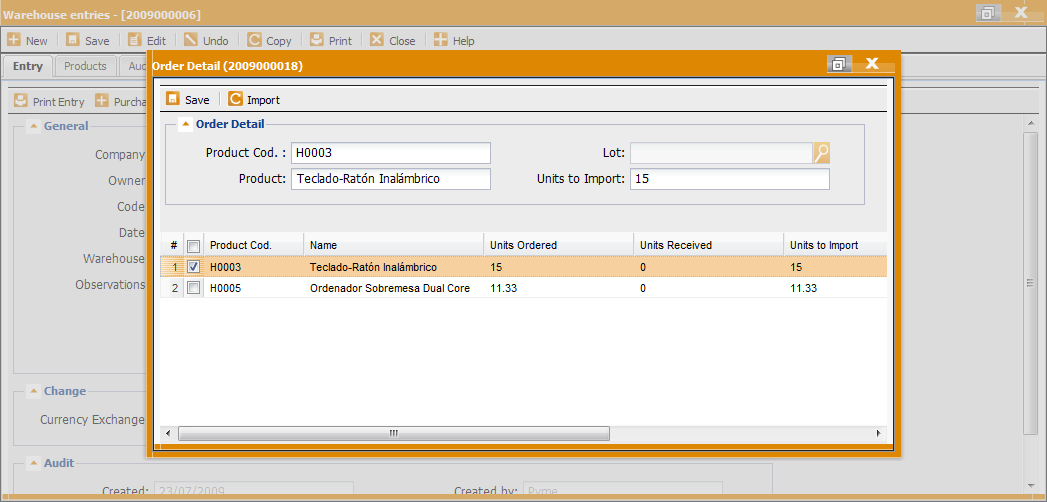
Import an Order the user can add product lines to a packing list already created:
-
Click on “Purchase Order”. All the orders susceptible to be imported to an entry will appear in a pop up window. Those orders need to have an open situation.
-
Select an order from the list.
-
A pop up window will show all the products susceptible to be imported to the purchase order. The user can change the quantity of units. By default, the application gives the quantity of the missing units of each product line. .
-
Click “Save”.
-
Click “Import”.
-
Print Entry